Section 10: Offroad Driving Tips
Steering

Hold loosely, thumbs up, just nudge the wheel
When driving on bumpy, uneven, naturally gouged trails – beginners often tense up and hold the steering wheel in a white knuckled death grip. The other Jeeps bounce along, swinging slightly from side to side – while new drivers exhaust themselves as they muscle the front tires to maintain perfectly straight heading.
Relax! Loosen your grip on the wheel, and let it oscillate in your palm. Allow your front wheels to twist a bit as they discover their own pathway. Feel the steering wheel jiggle and slip back & forth in your fingers; don’t fight it. If your vehicle starts to veer more than a foot or two to either side, then just apply a motherly nudge to repoint it in the proper direction.
Your tires will turn this way and that, as they pick their way over stones and across ruts & grooves. Give the wheel some slack. You are crawling on dirt at 5-15 mph; not zooming at 75mph on a freeway where the tires must be pointed perfectly.
Position your hands at 3:00 and 9:00. Maintain a loose and relaxed grip. Keep your thumbs pointing upwards outside the wheel, just in case a road hazard forces the wheel to vigorously lurch and spin. Picture your hand as an open C instead of a closed G.
Steep Hills
“The very first time you have to ascend a steep hill, It appears scarey, if not impossible. But you watch the vehicles ahead of you just plow right up there, so you know it can be done.”

Easier than it looks
The first time that you encounter a steep hill, you and your passenger will probably panic. You are thinking to yourselves that there is no way that our car can make it up that dirt & rock slope. And if you were in your “civilian” sedan – you’d be right.
But you are in a 4x4 SUV that is built for this kind of stuff! Jeeps and 4-Runners are not your everyday soccer mom family commuter wagons.
Before climbing that hill, the first thing that you want to do, if you are still in 4wd-Hi, is to engage 4wd-Low.
In a Jeep, that involves:
Coming to a complete stop, or just barely rolling.
Shift the Transmission to Neutral
From 4wd-Hi, push the Transfer Case shifter just slightly to the right, and then yank down, past Neutral, all the way to 4wd-Low.
Return the Transmission to Drive, or to M1.
If you need help getting into 4wd-Low, use your radio and ask. You could also ask the drivers ahead of you and behind you to coach or spot you as you work your way up.
“It is normal for a new Jeep to be stiff or finnicky the first few times you try to shift it into 4-Low. Don’t be embarrassed to ask for help. Especially while you’re nervous, eye-ing that big hill that you are about to tackle.”
When approaching a steep climb, wait patiently a short distance before the actual base of the hill. Allow the jeep ahead to make the ascent completely before taking your turn.


In the unlikely (but possible) event that the ascending jeep loses traction and must reverse back down the slope, you don’t want to be sitting in their downward path!
It is common practice for drivers to announce over the radio that they have reached the top and for the next vehicle in line to come on up.
Pay attention to the vehicles ahead of you as they make their ascent. Take note if their line favors Driver side or Passenger.
Use 4-LOW and shift into low gear (or M1/M2 sport mode).
When you climb a hill, remember that momentum is your friend. From your starting position a few car lengths BEFORE the base of this hill, try to get a “running start” to pick up some momentum. Don’t go fast because you will be going over some rough terrain but gather whatever momentum you can as you hit the climb.
Work your way up, slow and steady. Increase throttle as needed. If you feel a tire slipping, twist SLIGHTLY to alter your line as you give it more gas.
It is important to try and not stop while on the incline, because that kills your momentum.
When you reach the top of the hill (crest or summit), be careful that the trail does not abruptly turn to the left or right. Stop briefly at the peak, so that you can get your bearings. When your vehicle peaks over the crest, your hood is pointing upwards, and it may be difficult to see the trail until you level out.
Normally, the Trail Leader will announce to everyone what to expect at the top. The vehicle ahead of you should also be waiting until you finish the ascent. Front cameras definitely help a lot. But remember, you can use your radio and ask what you are supposed to do at the top.
What goes up, must come down
Use 4wd-Low to control your descents
Steep descents are similar. Use 4wd-Low and low gear such as M1/M2 to slow your speed without riding the brake too much.
Wait at the top until the vehicle ahead has cleared the hill and pulled forward out of your downward path.
Most Jeeps and some vehicles are equipped with a form of “Controlled Hill Ascent/Descent” (or something to that effect). On Jeeps, it is that strange button with a jeep and a speed control dial — that looks like a duck when you squint.

Squint and it looks like a duck
When you are in 4wd-Low and engage that button, the Jeep’s computer will control engine speed and braking on steep inclines to maintain a very slow crawl up or down. You do not need to manually step on the gas or brake. You can go slightly faster or slower by moving the Transmission Shifter into the Manual (sports) mode, and toggling forwards or backwards as if you were changing gears.
The Jeep will jerk and make grinding noises as the computer forces the slow, but controlled speed. It will automatically alternate between throttle and brake alternately, which is what you will be hearing.
Personally, I don’t use it and prefer just selecting M1/M2 and using the pedals. But you should try it and then decide if you like using it or not.
Speaking of pedals, in one of the Offroad Classes that I attended, we learned how to double-foot to force more power to our wheels. This technique works well with open and limited-slip differentials. Keep the right foot on the accelerator while simultaneously applying some braking with the left foot. That forces the engine RPM’s to increase and encourages (non-locking) differentials to direct more power to both wheels.
Ground Clearance
Besides hills, you will likely encounter some rocks, ruts, sand, and small ledges.
Ground clearance is an often used, yet often misunderstood term. To fully understand it, you need to familiarize yourself with your vehicle’s undercarriage anatomy and stop paying attention to marketing claims from automobile manufacturers. Everything that they have told you is a lie.
When most people hear the phrase “Ground Clearance”, they assume that measurement refers to the biggest size rock that their car can safely straddle and drive over without hearing a frightening clunk.
But car makers cheat, and only measure from the highest spot underneath, regardless of low spots surrounding it. That really doesn’t help us to go over that rock in the middle of our path.
Instead, we need to ask ourselves, “What part of our car is going to hit that rock and prevent us from driving over it?”

The lowest part of your vehicle is your differential housing cover, often called the “low hanging fruit”. More polite society calls it the “pumpkin”. The ground clearance beneath the pumpkin may only be around two fists for a stock Jeep.
Jeeps have two pumpkins. The front pumpkin is off center, on the Driver side. The Rear pumpkin is center.
To raise both pumpkins, we need to raise the axles. The only way to increase axle and differential height is to increase the diameter of your tires. For every two inches of tire diameter, the axle height increases by one inch, since the axle is theoretically at the dead center of the wheels. Upgrading from 29 inch diameter OEM tires to 33 inch AT tires would raise the axles and pumpkins by two inches. Upgrading from 33’s to 35’s gets you one more inch.

Image courtesy of Extreme Terrain
Out in front of the axle and differential are your tie rod, steering drag link, and track bar. Note that they sort of favor the Passenger side to some extent. We certainly don’t want rocks to damage the tie bar.
Once we get past the tie bar, front axle, and pumpkin – we deal with the height of the chassis frame itself. “Lifting a vehicle” refers to increasing the height between the axles and the chassis. This prevents our Jeep from becoming high centered and perched on something sticking up from the ground, such as a mound of sand, snow, dirt, or a rock.
Let’s return to dealing with that big rock in the middle of our path. If you try to straddle the obstacle, it must be smaller than the ground clearance of your tie rod and hanging fruit.
What if it appears taller than that? Instead of straddling the rock, you should go up and over it! Line up one tire so that it will roll onto and clamber over that rock. As your tire goes over, your tie rod & axle will also raise up, so you can safely clear that obstacle.
Although a civilian sedan might react to that rock as if its tire was chucked and stop, your 4x4 will just glide over it.
After your 4x4 has rolled onto the top of that rock, it is going to roll back down the other side. This is where having a LIFT can help. The lift means that your chassis is higher than stock height, hopefully greater than the size of that rock. Otherwise, parts of your underside in line with your tires might scrape along that rock. Skid plates and side rails (aka rock rails, rock sliders) or “slider steps/slider running boards” are reinforced to absorb the weight of your vehicle as it crosses over that rock. Note that plastic running boards that come stock with some Jeeps or non-reinforced entry steps may suffer damage if the rocks are too big.
But before you get scared, understand this is why Trail Leaders pre-run trails and rate the difficulty level of the terrain. Trail descriptions will indicate “stock friendly” if non-lifted vehicles are okay, or if larger diameter tires and lifts are recommended.
This is another reason NOT to venture out on your own to explore trails that you found online. Those online trail ratings and descriptions may not have been updated since the last big storm altered the terrain. What used to be an Easy trail may have eroded into a Difficult.
Rocks and V-notches


As we pointed out, for rocks over several inches tall, put one tire directly in its path – and drive up over the rock. Only straddle short rocks; roll over the big ones!
A tall mound of dirt between road ruts can high center you or damage your underside. Try to get at least one tire onto a bank to raise your axle and allow your Jeep to straddle the rut, while placing your other tire on the mound itself.

Ride your tire shoulders up on the banks as you straddle the v-notch
If you encounter a wide or deep single channel, what we call a V-Notch, the solution is to straddle the canyon with tires up on both ledges. Sometimes you will be riding just on the outer shoulder or corner of your tire, literally along the inside sloped walls of the V, but that is why we spend the big bucks and get heavy duty AT/MT tires that allow us to do this sort of thing.
If you are not sure about your tire placement, ask for a Spotter to guide you.


Driving on Sand
Driving in soft desert sand takes some getting used to, but most of us consider it a lot of fun. When you drive on sand, you need to maintain momentum and keep your speed up. Should you slow down too much or stop -- the inertia of trying to get moving again causes you to lose traction and dig your tire into the sand. Do not tailgate the cars ahead of you, so that you are not forced to slow down on account of them.
Stay in 4wd-Hi for speed, but manually turn OFF the Traction Control switch, because it will direct power to the WRONG wheels when trying to regain lost traction in sand and snow! On a Jeep, you should hold the Traction button for a full five seconds, to fully disable the electronic stability control as well.
Consider airing down your tires a few psi lower than your usual offroad setting.
Don’t stop on a sandy incline. Keep moving. If you are following in previous tire tracks, turn the wheel back and forth slightly to improve traction.

Getting stuck in sand is common and happens even to the most experienced offroaders. No one will laugh at you. Luck plays as big a role as skill. The easiest way to get unstuck is to use a kinetic recovery rope, and just quickly attach it via soft shackles to the recovery points of both vehicles. Yes, you could unscrew the D-rings and loop the rope through them and then retighten them, but it is much easier just to put the soft shackle through the D-ring.
An alternative would be to use your traction boards.
One word of caution: Be very careful about driving on shoreline sandy beaches. If it is dry sand, up where the beach joins regular land and distant from the water line — okay. But sand close to the water line can be deceiving, because the top surface is exposed to sunlight & wind, so it appears fine. But lurking just inches beneath the dry surface could be wet mud that can trap you.
If another vehicle is attempting to use a kinetic line to jerk you free, or a winch to pull you out — make sure that the recovery vehicle is far enough away to remain on solid ground. Use your tow lines as extension lines to increase distance.
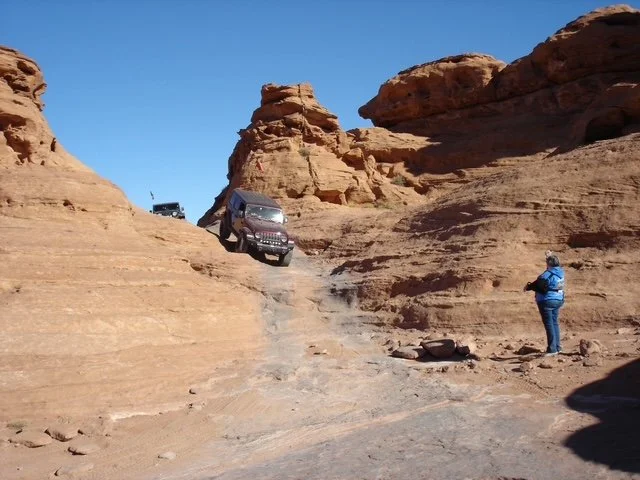
Ledges and Steps


To get up and down small ledges, steps, and waterfalls (not really water, just cascading rocky steps) … power through them slow and steady. Jeeps and 4x4’s are designed to climb a lot more than you think. Make sure that your tires are straight on target and just give it some gas. If you are unsure of what line to take, ask for a spotter to guide you.


Use 4-Low and M1 for maximum torque climbing up, as well as for controlling your descent. Try two-footing it (one foot on gas and other foot on brake) so that you maximize power to all wheels (if you don’t have lockers), and to prevent you from sliding backwards.
When coming down from a steep ledge or step, you don’t want your nose to slam into the ground. Ride your brakes so that you just keep inching down until your front tires level out. Keep inching slowly, because your rear still has to slide down the ledge.
What about Bathrooms?

Sometimes there are vault restrooms or porta-potty’s at trailheads and campgrounds, but much of the time we just must rely upon natural cover such as bushes and rock formations.
Just use your radio to ask for a “bio break” or a “10-100”. That includes your furry four-legged co-pilots as well; you know what that whine means.
The group will stop and give you as much time as necessary. Other offroaders will avail themselves of the opportunity as well. Take care of business. No one is going to leave without you!
Men to the left (or to the rear), ladies to the right (or to the front).
“Remember fellas, ladies to the right and men to the left — because ladies are always right!”
We respect each other’s privacy, so don’t worry. We are all adults. You don’t have to wander a mile away; just distant enough not to be conspicuous.
If you expect to be “a while”, make sure someone knows, and bring a handheld radio.
Maybe bury your waste, or maybe not, so long as it is discreetly away from the trail. However, bag and pack out your tissue & wipes so it doesn’t litter up the environment. Carry a small trash bag so that we can leave nature as we found it.

Every vehicle should pack one of these!
Out in the Western desert, large shrubs affording privacy may be hard to find. A very convenient solution is this Pankay Privacy Tent. They are lightweight and quick to deploy. Imagine a folding windshield sunshield, but with drop down sides. You just put it on your head, and wear it like a big sun hat. A fabric cylinder braced with wire hula hoops drops down from the hat brim, and you have a personal tent. When you are done, just fold it back up. Simple and easy. Approx $25 on Amazon. (Seat is not included.)
These work so well and are so easy to use, that we usually buy an extra Pankay for other club members to purchase from us on the trail (at cost).
Trail Etiquette

Stay on the designated trail or road. Don’t speed or chew up the trail. (Yes, we dislike ATV’s and SxS’s who think that these trails are a racetrack, but we’ll save that rant for another time.)
Do not shortcut across open patches of natural terrain. Respect the environment. “Tread Lightly”
Pack out whatever you pack in. Pick up your litter; be mindful of your waste; bag your toilet paper, wipes, etc.
Learn the difference between modern litter versus historic artifacts. For example, 100-year-old rusted bean cans are historic, but deflated mylar balloons are merely a modern hazard to wildlife.
We love our furry co-pilots, but keep your pets leashed when outside of the vehicle. You don’t want your dog wandering off and getting lost; and the rest of us really don’t want to spend hours searching for it. It probably goes without saying that if your pet tends to be aggressive towards strangers or other animals – then they should not travel with you on the run.
Likewise, know the temperament of your children. There are two kinds of kids -- those who love offroading, and those who don’t. Do not force the issue with your child, because once you head out on a trail run, there is no leaving early on account of a tantrum.
Even though we are far away from traffic cops, only LICENSED adults can drive on a trail run. There may be legal exceptions, such as in some recreational OHV parks, but for everyone’s safety – trail runs are not the place to practice your learner’s permit.
If you see on-coming traffic, or traffic coming up behind you – announce it on the radio so that the group can pull over. If opposing traffic pulls to the side to let your group pass, we show them with our fingers how many more vehicles remain to be passed. When a group passes you, we show with our fingers how many more vehicles remain to be passed. This is usually handled by the Mid and Tail.
Don’t do the “Jeep wave” – since showing 2 or 3 fingers can be misunderstood as there only being 2 or 3 more jeeps in the column. If you do give them a friendly wave or salute, don’t do it with raised fingers.
Make sure that any vehicles stopped alongside the trail are okay and not in need of assistance.
On hills, the ascending traffic has the right of way, since it is more difficult to regain momentum on the way up, compared to just riding gravity on the descent.
If you see a lone stopped vehicle, always ask if they need assistance. Cell service is often non-existent.
Whenever passing hikers or stopped bicyclists, inquire if they are okay, if they need extra water, or could really use a ride. You would be surprised at how many wanna-be athletes underestimate their weekend workouts.
Drive with your headlights ON, so that your vehicle is more visible to oncoming traffic. You will need to switch your headlight selector from Automatic to Headlights, since Auto does not turn the full headlights on during daylight.
Your lights also make it easier for the jeep behind you to see you through dust clouds. You can also activate your emergency flashers to increase your visibility in dust or fog.

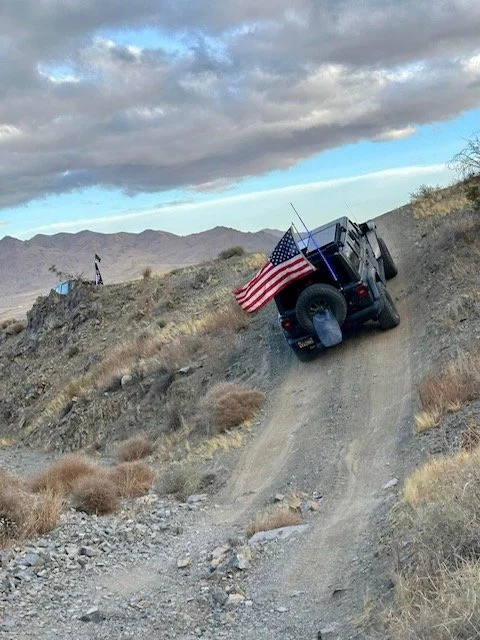
Whip flags increase your vehicle’s visibility
Tall whip flags make it easier for other vehicles to spot you as you traverse uneven terrain, or approach the crest of a hill. Nearly all of the backroad trails are only one vehicle wide, so any oncoming traffic will be heading directly at you. Flags make your presence easier to spot, even if most of your car remains hidden by natural surroundings.
Although they are not required for most trail runs (except in dedicated OHV parks, who usually DO require them on all vehicles), they are inexpensive and a worthy addition. Handyflag.com sells whip flags that fold up like tent poles, so that they are convenient to pack. Amazon has several vendors who will print you custom flags with your own uploaded design.
Congratulations!
〰️
Congratulations! 〰️
You have concluded this Beginner’s Guide to Jeeping & Offroading.
Yes, it was a long read. But we covered a whole lot; the equivalent of a full day or two’s classroom lectures. Some commercial training organizations would have charged $50 to $250 to attend their classes.
In martial arts, there is a saying: “White belt signifies the beginning of training; a black belt signifies the beginning of true learning.”
This Beginners Guide provided you with a basic overview about jeeping & offroading, and hopefully answered many of your questions. Of course, there will always be lots more to learn. That’s the fun and challenge of offroading; there are so many levels and styles of participation. It never gets boring.
Your next step should be to join a local offroading club near you and get your wheels dirty on a Beginners Training Run. Find a club in our Community Directory (still a work in progress), or just try some Google searches for “jeep clubs near me”, “4x4 offroading clubs near me”.
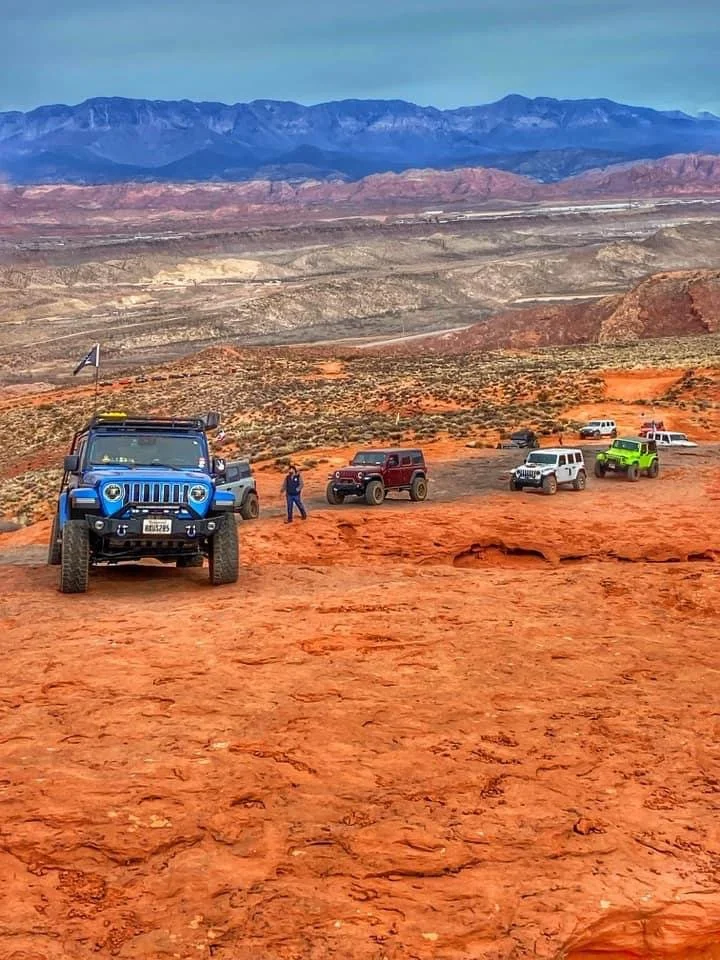
Enjoying ourselves at Winter 4×4 Jamboree near St George Utah
In addition to this free online coursebook about offroading basics, there are additional articles and resources here at Offroading.info , so keep browsing. Everything on this site is free, and nobody is trying to sell you anything.
201: On The Trail covers intermediate topics, such as Overlanding, Winching, Tips & Tricks. There is also a beginner’s article about what to expect on your first trail run. Learn about the Jeep Wave and Ducking.
301: Must-Have Gear deals with upgrades and accessories for your vehicle. Required stuff such as Comms/Electronics, GPS Navigation (including a detailed Users Guide for onX software). Favorite gadgets. Sway bar disconnects.
401: Trail Leading includes resources for Trail Leaders and Gunners. Examples of Drivers Briefs, Waivers, and procedural stuff.
Community includes a Directory of Clubs, Facebook discussion groups, offroading associations/agencies. Major events including offroading gatherings, jamborees/safaris, vendor expo’s. We even included a blog about food: campsite and BBQ recipes — which we admit, really has nothing to do with offroading, but we enjoy cooking!
Tell us at Offroading.info what’s on your mind. Or share some of your wisdom with the rest of us. We are always looking for more articles, writers, and news.
Use our Contact form to send questions or comments to me and I will try to respond as soon as possible.